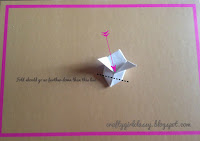
You will need:
- 1 square piece of paper. It is prettier if one side is patterned or colored while the other side is
plain
----------------------------------------------------------------------
1. Begin with the colored/patterned side facing up. Fold the right edge to the left edge. Crease and open. Fold the top edge to the bottom edge. Crease and open. Now there should be a cross going across the paper.
 2. Flip the paper over. Fold diagonally, the top-right corner down to the bottom-left corner, and the top-left corner to the bottom-right corner. Open the paper up again. Now there should be a cross with an X going across your paper,
3. Bring the top-edge of the paper to the bottom-edge of the paper. At the same time, pinch the left and right edges of the paper together.
Your end result is like two triangles stacked on each other. There is a crease line in the center going from the bottom edge to the top point.

4. Taking the two bottom corners of the front triangle, fold it so the corner touches the top point, and the bottom edge will line up on the center crease line. Now it looks like a diamond on top of a triangle.

5. Fold the two left and right corners of the diamond into the center of the diamond.

6. At the top of the diamond, there are two loose corners, in front of the top point of the triangle. Now, imagine a horizontal line running through the center of the diamond. Imagine a point at each side edge on that horizontal line. Fold right top corners down so the top meets the point we just imagined on the right side. Repeat on the left side.

7. Pry open the layers of paper on the right side made in step 5 so you have a pocket (ease open at the red arrows). Repeat on left side.
8. Tuck those top corners down into the pockets. Flip over the paper so the other side is up.
9. Just like in step 4, take the two bottom corners of the triangle, fold it so the corner touches the top point, and the bottom edge will line up on the center crease line. Now there is a diamond.
11. Fold the two top corners out, as shown in the picture. These will be the ears.
12. Blow air into the little hole at the bottom point of the diamond. You may need to help shape it out. (Also, don't blow too hard, or the hole will tear.) Then, pry open the ears and shape them.
13. Voila, you have a rabbit box!
Wouldn't it be cool to make a bunch of these rabbits, poke a hole in the back of each, and place them overtop of a string of lights. That would make a lovely string of bunny lights! I hope you guys enjoy making these, because it will be hard to stop! Let me know what you think of them.
Wouldn't it be cool to make a bunch of these rabbits, poke a hole in the back of each, and place them overtop of a string of lights. That would make a lovely string of bunny lights! I hope you guys enjoy making these, because it will be hard to stop! Let me know what you think of them.
See you soon!
Christina


No comments:
Post a Comment